

Here's an easy little packaging project for the holidays that I hope you will try out. I love to create simple paper headers and attach them to clear plastic bags .. they are perfect for party loot bags and teacher/class gifts. In my examples, I used the lip-n-tape bags from Creative Bag because I like that you can reopen the bags if you need to and they come in lots of different sizes.
I created another freebie for you to use if you'd like to make some of these yourself. Again the art is for personal use - no commerical use. You can download it by clicking on the link under the photo. I designed the art so that you could personalize the header on the front and/or back using graphic software. I'll tell you more about adding a handwritten message on the back in a minute.


So let's get started! First you will need to print my download on your colour ink jet or laser printer on white heavy weight card stock. These are the tools that I used to create my bag header: paper cutter (if you don't have one you can use scissors), pencil, ruler, bone folder, scoring tool (optional) and a stapler.

The first step is to score the folded edge of each of the headers. You want to use a paper scoring tool if you have one or the pointed edge of a bone folder. The dotted lines indicate where you will need to fold. Line your ruler up along the dotted lines and gently score the paper. Once that is done, you are ready to cut out the headers on the paper cutter. The solid crop marks on the art indicate where to cut. Note: if you do not have a paper cutter, use a ruler and pencil to outline the headers and cut with scissors. Next you will fold the headers in half where you scored the paper. Go back ove the folded edge of the paper with the bone folder to create a clean flat edge.
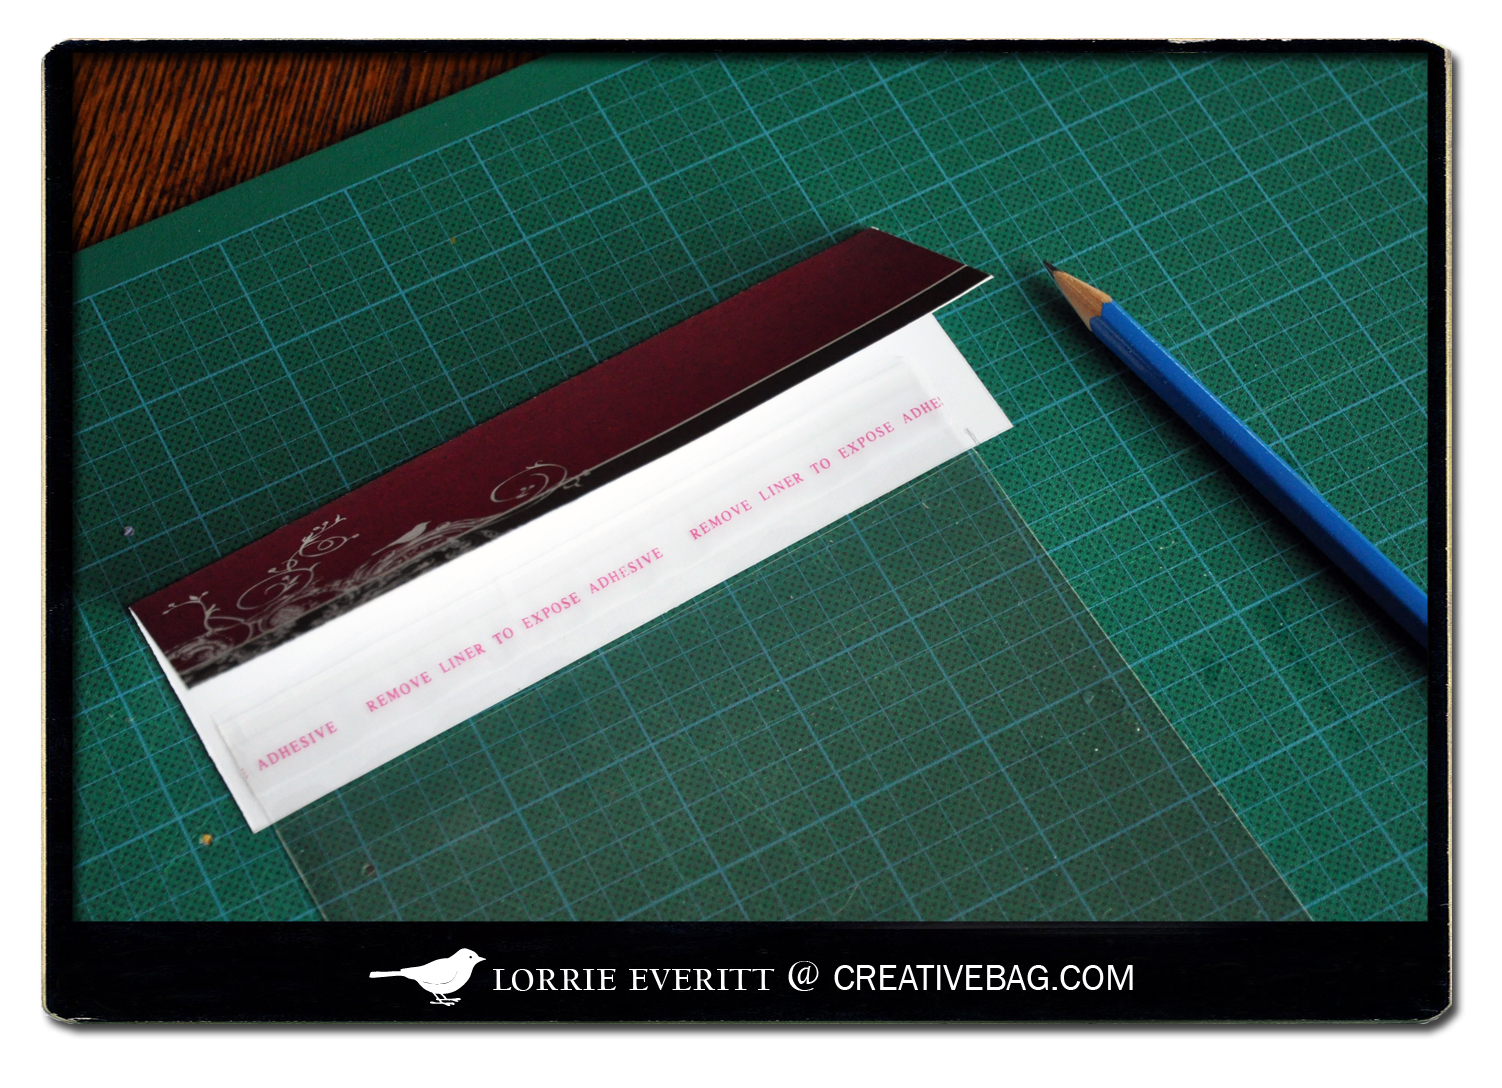
I designed the header so that it could be adapted to fit a number of different bag sizes. You can trim the right side of the header to fit the width of the clear bag you are using if the header is too wide. As you can see, I used a pencil to mark how wide I needed my header to be for my clear bags ... I wanted the header to be slightly larger than the bag. Cut the header using the paper cutter and you are now ready to add the "goodies" to your clear bag.

I left space on the back of the header to add a handwritten message if you want. I would suggest doing this before stapling the header to the bag. Once you have added your goodies to the bag you will want to seal the bag. Then simply add the header to the top of the bag so that the clear bag is sandwiched in between the folded header. Then staple the header and bag together. I placed three staples on the header near the bottom edge - one along each bottom corner and another one in the bottom middle.

I often make these for friends in our neighborhood and attach them to their doors as a little surprise during the holidays. The kids love them at Halloween! You can see that I personalized the header with our family name. I also added a hole and ribbon so that I could easily tie them onto a door handle.

Just to give you another idea for these bag headers ... I've used them in previous years for non-food items like mini calendars (see above), packages of handmade cards and picture cds!
I hope that you are having a wonderful, creative day!!


This is so neat! What a simple yet huge impact to a plain bag. Really beautiful. I love it! :)
ReplyDeleteI appreciate your creativity. Such an impressive work with a plane poly bag, it just changed into an attractive and useful bag.
ReplyDeleteHeader Bags & Tags
great job!
ReplyDelete